Have you ever been climbing a pitch and end up with a pig’s tail of twisty rope at your harness? I have. And it makes me crazy. I’ve had it happen when leading, when seconding, with single ropes, half ropes, and twin ropes—both new and old. The twisty rope syndrome has been around as long as climbers have been roping up. Let’s look at why this happens, how this happens, how to make it not happen, and if there are any risks to having ropes with excessive twisting.
CAUSES OF A TWISTY ROPE
I’m sure there are more, but I’ve narrowed it down to four main reasons that can cause a twisty rope:
1. coiling/uncoiling
2. lowering – anchor placement
3. lowering – tight radius
4. using a Munter hitch while rappelling.
1) Coiling/Uncoiling
Up until fairly recently, ropes came “old-school” factory coiled from almost every rope manufacturer. Sure, some came loose in bags (which actually avoided coiling and uncoiling issues) but most were coiled similarly to the way you wrap an orange extension cord around your upper arm or shoulder and hand. Think Mountaineers Coil.
Old School Factory Coil
Mountaineers Coil
If an unknowing climber were to just take a factory-coiled rope and pull it from the coil, the end result would be a twisty rope that would take days to work itself out.
Incorrect uncoiling technique
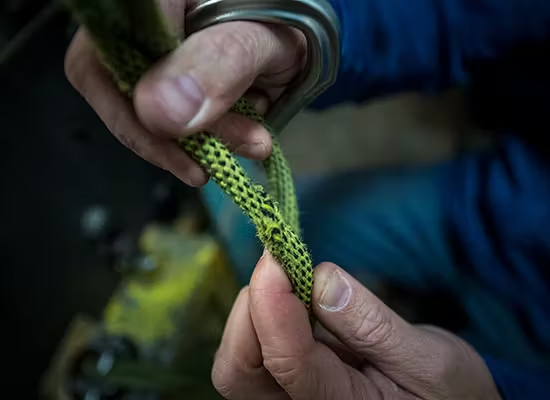
For many years and even still today with many ropes, there is a “suggested method” to uncoil a new rope. Using the arm-over-arm uncoil method, followed by just feeding the entire rope-end through your hands a few times basically reverses the coil that took place at the factory—the end result was a twist-free cord.
arm over arm coil technique shown
feeding the rope
Many rope manufacturers have fairly recently updated their factory coiling process to a “lap coil” or “climb ready” coil—which does NOT impart a twist during the coiling process. And because there is no twist during the coiling process, it is therefore not necessary to reverse the process while uncoiling. With these ropes, you can take a rope right out of the package and start climbing with little risk to having a twisty rope. Sweet! Though this may not seem like a big deal, it actually is quite an innovation in climbing ropes that not only alleviated the dreaded twisty rope syndrome, but also saves time.
New School “Climb Ready” Factory Coil
Climb Ready Coil = Good to Go
left: New School “Climb Ready” Factory Coil
right: Climb Ready Coil = Good to Go
2.) Lowering – Anchor Placement
When you lower from a route, the orientation of the anchor placements can have a major effect on your rope. Ideally, there are two bomber anchors, equalized with quicklinks, rap rings or chains. When both anchors come to one focal point (i.e. the rope takes the shape of a V), and you are lowered, it has minimal effect on the rope.
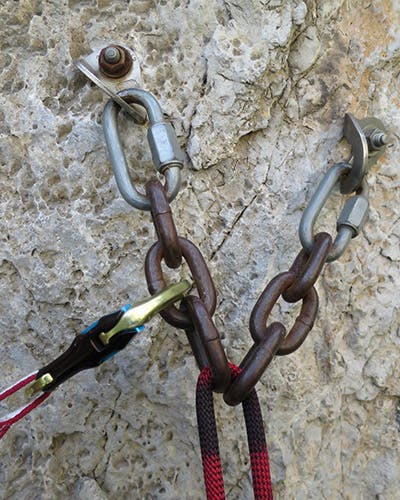
Left and right: Good Anchor Placement
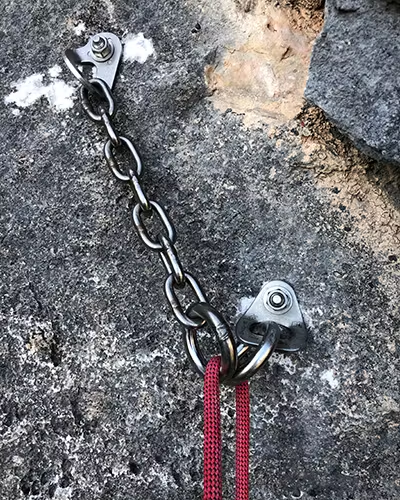
However, if the anchors are placed a distance apart, resulting in the rope going up, over and down—then this can greatly twist the rope. If this is the case, it’s almost always better to rappel the route.
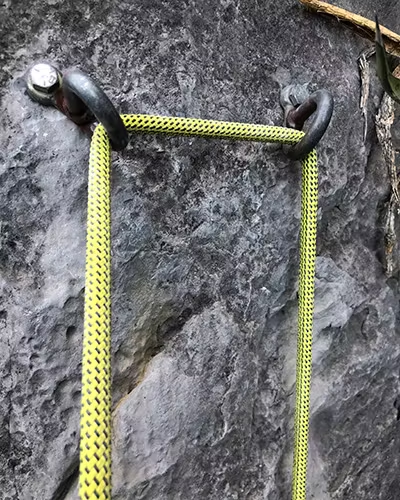
left and right: Not ideal anchor placement
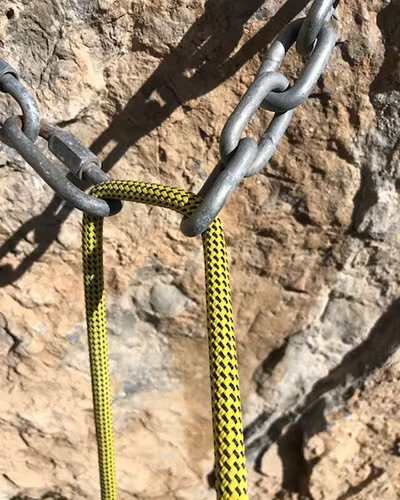
3.) Lowering – Tight Radius
Have you ever wrapped a birthday present, getting all fancy with some ribbon, and use scissors and the pressure of your thumb to slide down the ribbon and cause it to be all curly and fancy?
Well, this is similar to what can happen if you lower off a singular tight radius carabiner. Now most carabiners, quicklinks and chain links have a big enough radius that this doesn’t happen, but on a small cross-section biner, chain link, or the biggest culprit—a rope grooved carabiner—this can cause the rope to pigtail.
4.) Rappelling with a Munter
This doesn’t happen too often nowadays as most folks are using belay devices of one sort or the other. But be warned—if you rappel a rope with a Munter hitch, it will twist the bejeezus out of the rope.
One way to avoid this is to ensure the ropes are fully free hanging … at least that way, the twist is being driven right to the end of the rope. Another way to deal is to have one person rap with a “left-handed Munter” and the next to rap with a “right-handed Munter.” This will balance out the twists and the net result will be less noticeable.
And once again, the best way to avoid a twisty rope when rappelling with a Munter is to NOT rappel with a Munter.
HOW TO UNTWIST A TWISTY ROPE
There are many theories out there. One is to allow the entire length of the rope to free hang off an anchor, blow in the wind and de-kink. This is a good start, but can be challenging to find the appropriate place. The staple method is to have your rope set up TR style, through two quickdraws, and just pull it back and forth a few times—tugging and pulling. This helps. You can find yourself a nice grassy field and just drag your rope on the ground—basically take it for a walk for a little while—that’ll allow it to un-funk itself a bit. But I find the best way is to run it through an ATC style belay device a few times—either on a route, or on the ground.
A few winters ago I blasted up to Alaska for a quick (failed) attempt on a peak. At the airport hanger in Talkeetna, my buddy and I were racking up—we had just brought a brand new old-school coiled cord for the climb. I was dealing with the rack when I glanced over and was horrified to see my buddy just pulling the factory coil apart with not a thought or care in the world. I knew instantly that our cord was destined for the biggest twisty-kink mess of all time. We ended up taking the rope out and laying it on the snow-covered runway and stretching it out as much as possible. We actually tied it to the landing gear of a plane, put our harnesses on, and walked the entire 70m length backwards while running the rope through our ATC belay devices. We did this three times each and at the end of it all, we had worked out the kink-mess pretty well and proceeded with our unsuccessful climb.
RISKS?
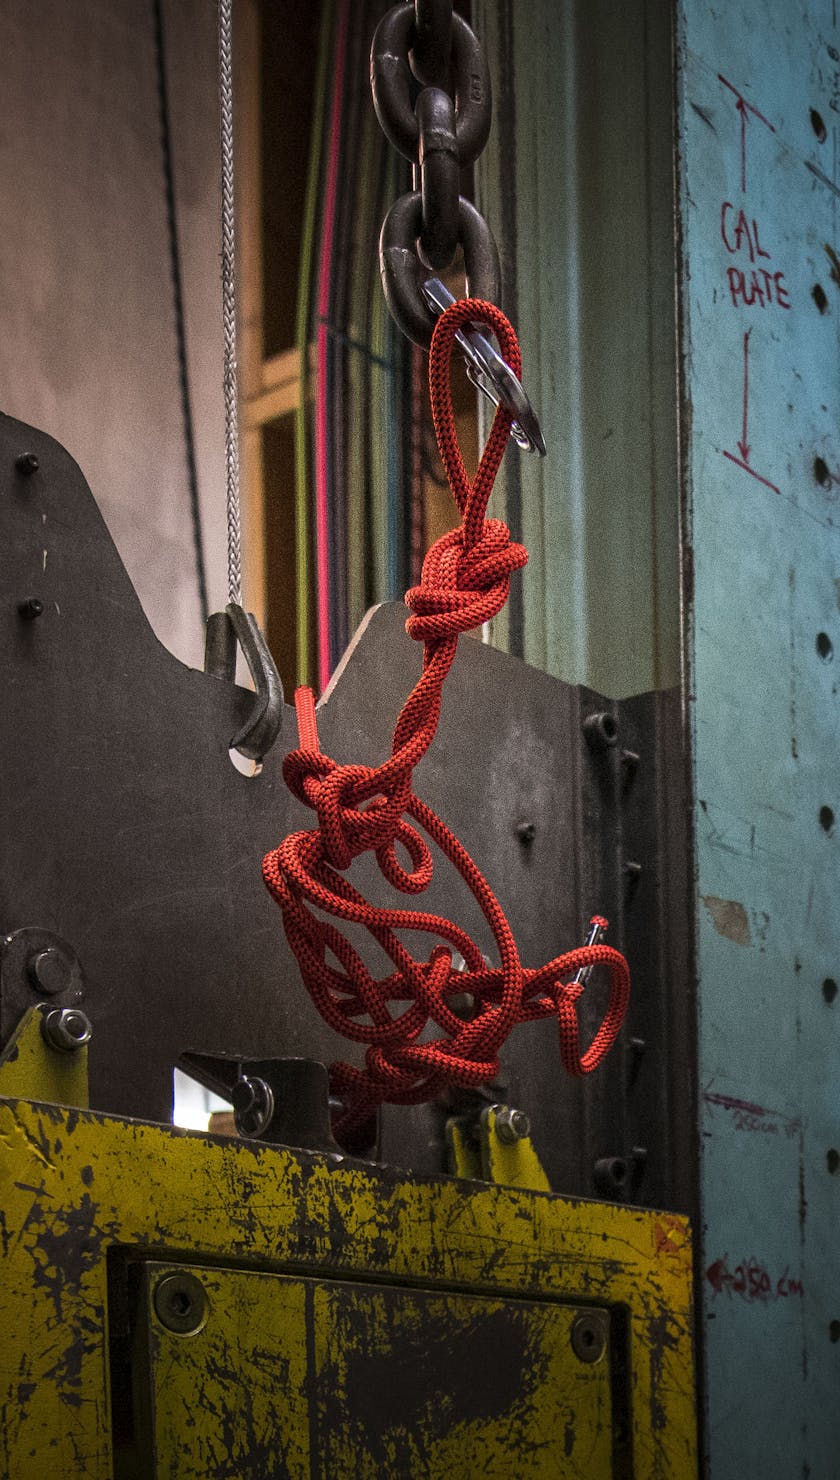
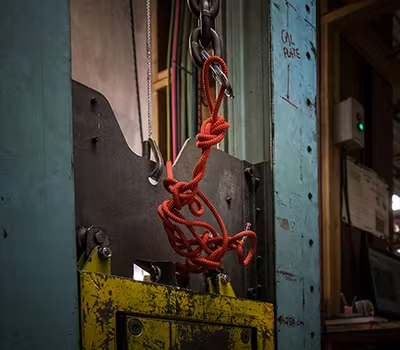
Other than the frustration of a twisty pig’s tail at your harness, perhaps getting tangled in quickdraws as you’re seconding or trying to clip while leading, I had always wondered if there was a risk with dynamic loading on an overly twisted rope. Could the act of falling on a twisty rope cause the rope to core-shot itself? We headed down to the drop tower with a bunch of different ropes to find out.
TESTING
We decided to test in two main scenarios—leading and seconding.
We pre-twisted the ropes to fairly excessive levels prior to each drop.
TESTS
We kept the loads on the slightly harsh side mainly by having a static belay:
1. A typical top rope fall with a bit of slack in the system – static (i.e. no slip) belay
2. A lead fall onto a quickdraw, fall factor > 1.0, with a static belay
Lead Fall Setup
Samples
We grabbed some ropes from around the office, both new and old of varying diameters.

Results
Top Rope Setup
Lead Fall Setup
| Sample | Drop | Load (kN) | Comments |
|---|---|---|---|
| Used Green 9.4 | TR | 4.65 | No visibly excessive damage |
| Used Pink 8.1 | TR | 3.81 | No visibly excessive damage |
| New Orange 7.9 | TR | 4.37 | No visibly excessive damage |
| Used Purple 8.0 | Lead w/ draw | 5.72 | No visibly excessive damage |
| Used Green 9.4 | Lead w/ draw | 6.79 | Beginning to show core shot; very flattened |
| New Blue 9.9 | Lead w/ draw | 6.97 | No visibly excessive damage |
| Used Orange (7.9) & Pink (8.1) | Lead w/ draw | 6.52 | No visibly excessive damage |
| Used Green 9.4 | Lead w/ locker | 5.72 | No visibly excessive damage |
Used Green 9.4— Showing Slight Damage
CONCLUSION
Based on our limited, though semi-extreme testing (both high level of twistiness, as well as high loads), it appears unlikely that falling on a pig-tailed rope will cause the rope to core-shot, though a more used rope did show more signs of “damage” (excessive flattening and starting to show signs of possible core shot) during twisty loading than new or less-used ropes.
BOTTOM LINE
Well, finally I can rest easy. As I’m struggling to second a pitch that my rope-gun wife has led, and I’m about to pitch onto a pigtailed twisty rope mess at my harness, I need not worry as the chance of said rope mess causing anything funky to happen is unlikely. Whew.
When lowering from a route (or top-roping), lower off quickdraws when possible to save the anchors—ensure quickdraws (gates opposed) are equalized at one focal point to eliminate the chance of the rope twisting—and when it’s time for the last person to get down, notice the anchor orientation. If the anchors are spread a distance apart, it may be time to rap to avoid twisting your rope.
When working on your sport proj that you and many others have been failing on at that same stopper move and are lowered to the deck in frustration, have a look at that draw you’re being lowered off. If the biner is getting significantly rope-grooved, do your part and donate a new one to the cause. It’ll help avoid your and other’s ropes from getting twisty, prematurely worn or worse.
And finally, remember when you’re about to use a brand-new rope, it’s always best to spend the time to uncoil properly. If it’s factory coiled, use the arm-over-arm method. If it’s ready-climb coiled then you’re good to go.
Be safe out there,
KP
Featured Gear